Sudoku Solver
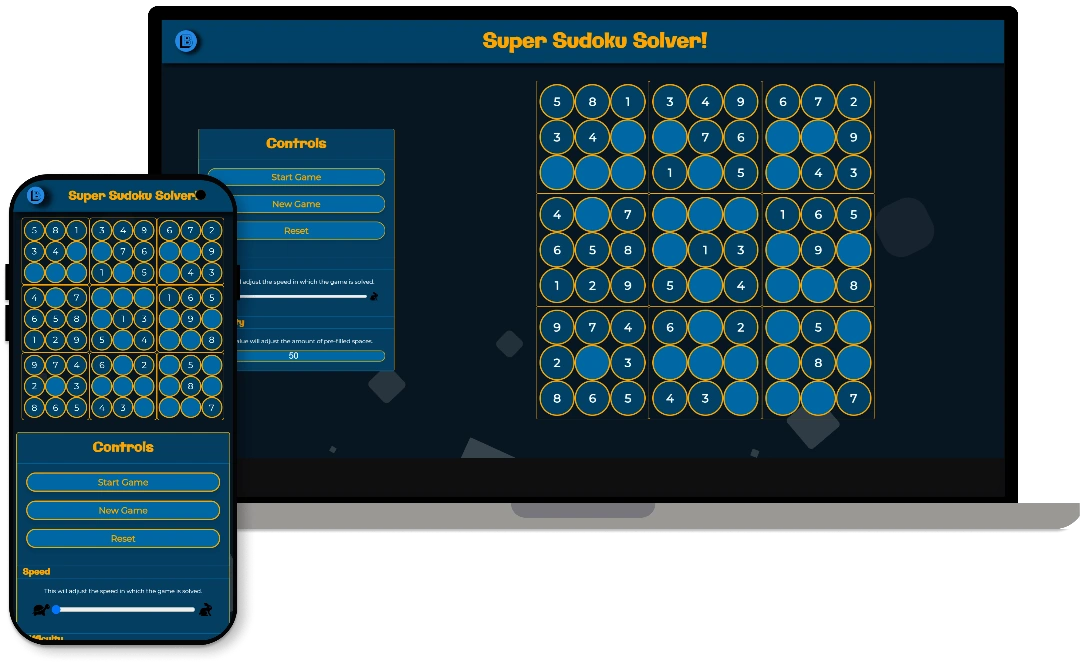
Sudoku Solver is the first project made by yours truly, Bryce Lynch. After completing an algorithms course at uni, I became very interested with the concept of writing an algorithm to solve sudoku puzzles! This page will outline the journey I took to build what you see before you.

Getting Started
The first aspect of this project that I had to make a decision on was which language do I use? From all of the assignments at uni, I am very familiar with Java and C++. Java seemed like the overall easier option of the two, given its garbage collection system and greater abstraction from memory management. But it’d been a while since I’d used C++ and I do enjoy the more granular control over memory usage it offers. However, both languages had two main points that made me ultimately decide against using either:
- I did not have the appropriate environments set up on my machine
- I am not familiar with any UI libraries for either language
Conveniently, I had recently set up Visual Studio Code (Check it out here, it is a fantastic editor that is extremely versatile) with some great plugins that make web dev wonderfully easy. Therefore, I decided to write it in JavaScript! Certainly not the most performant language, but my goal for this project wasn’t to make a heavily optimized engine. It was more so to learn the concepts of a sudoku solver, and (after choosing the language) reaffirming my knowledge of JS.
Backend Architecture
Classes
At the time of developing this project, I was unaware of official JS classes. However, due to most of my prior development experience being with the Object Oriented Programming (OOP) paradigm, I still attempted to organize functions into separate files which I referred to as classes.

GameController
This class is responsible for solving puzzles, updating the solving speed, and modifying the difficulty of puzzles

PuzzleGeneration
This class is responsible for generating new puzzles for the solver

UIController
This class is responsible for updating the UI such as when the page first loads, or while the solver is in progress

Helper
This class contains miscellaneous functions such as implementing a delay function, and functions to translate array indexes to grid Ids
My first step during development was to determine how to store a game board while it was being solved. I decided to implement a 2D array of integers, using zeros to indicate an empty space as the only possible values in a game of sudoku are 1-9.
Step 1. Make a debug game board
My usual mindset for solving a problem is to try and identify all of the variables that contribute to the problem, and either remove or mitigate the affect they have. In this case, we obviously want a puzzle solver capable of solving all types of puzzles! (Absolute shocker, I know). So to make things easier on myself to start with, I decided to control the puzzle that the solver would work on. That way, I could predict the results more easily, which would allow me to notice bugs or errors quicker. Therefore, this sophisticated and highly complex debug function was born.
Wow, look at that. Isn’t is beautiful? Such elegance in its simplicity.
Alrighty, so now things are a bit easier because I know how this puzzle can be solved. It should be noted that depending on the sophistication of the algorithms used to generate sudoku puzzles, it is entirely possible that some puzzles can have multiple solutions. To ensure this wasn’t an issue, I had the brilliant idea to ignore this concept entirely. And it never did become a problem! At least not so far…
Step 2. Design the Solving algorithm
Before I started implementing the solving algorithm, I decided to take note of what I considered to be important information about sudoku. So naturally, I started by considering the standard sudoku rules:

The only allowed values are the numbers 1 to 9

All of the numbers 1 – 9 must appear only once in every 3×3 grid

All of the numbers 1 – 9 must appear only once in every column

All of the numbers 1 – 9 must appear only once in every row
Although these rules are conceptually very simple, it is extremely important to really understand them. Doing so will only make the rest of this project easier. I don’t know about you, but I certainly can’t develop software for something I don’t understand!
Step 3. Implementing the Solve function
Based on my understanding of the rules of sudoku, I began to design a function that would follow this process to solve the puzzle!

You may ask yourself “But what happens if the algorithm can’t place the number in the current space?”. And to that, I would say “Great question!”. In the event that the algorithm determines it cannot place a given number, say 1, in the current space, it will then try to place 2 in that space. If it cannot place 2, then it will try to place 3, and so on until it can either successfully place a number in that space, or it runs out of numbers to try. If it gets all the way to 9 and still can’t place that number into the space, it will then backtrack.
Backtracking? What the heck is that?!
If you’re unfamiliar with the concept of backtracking, then good news! We’re going to briefly discuss it here.
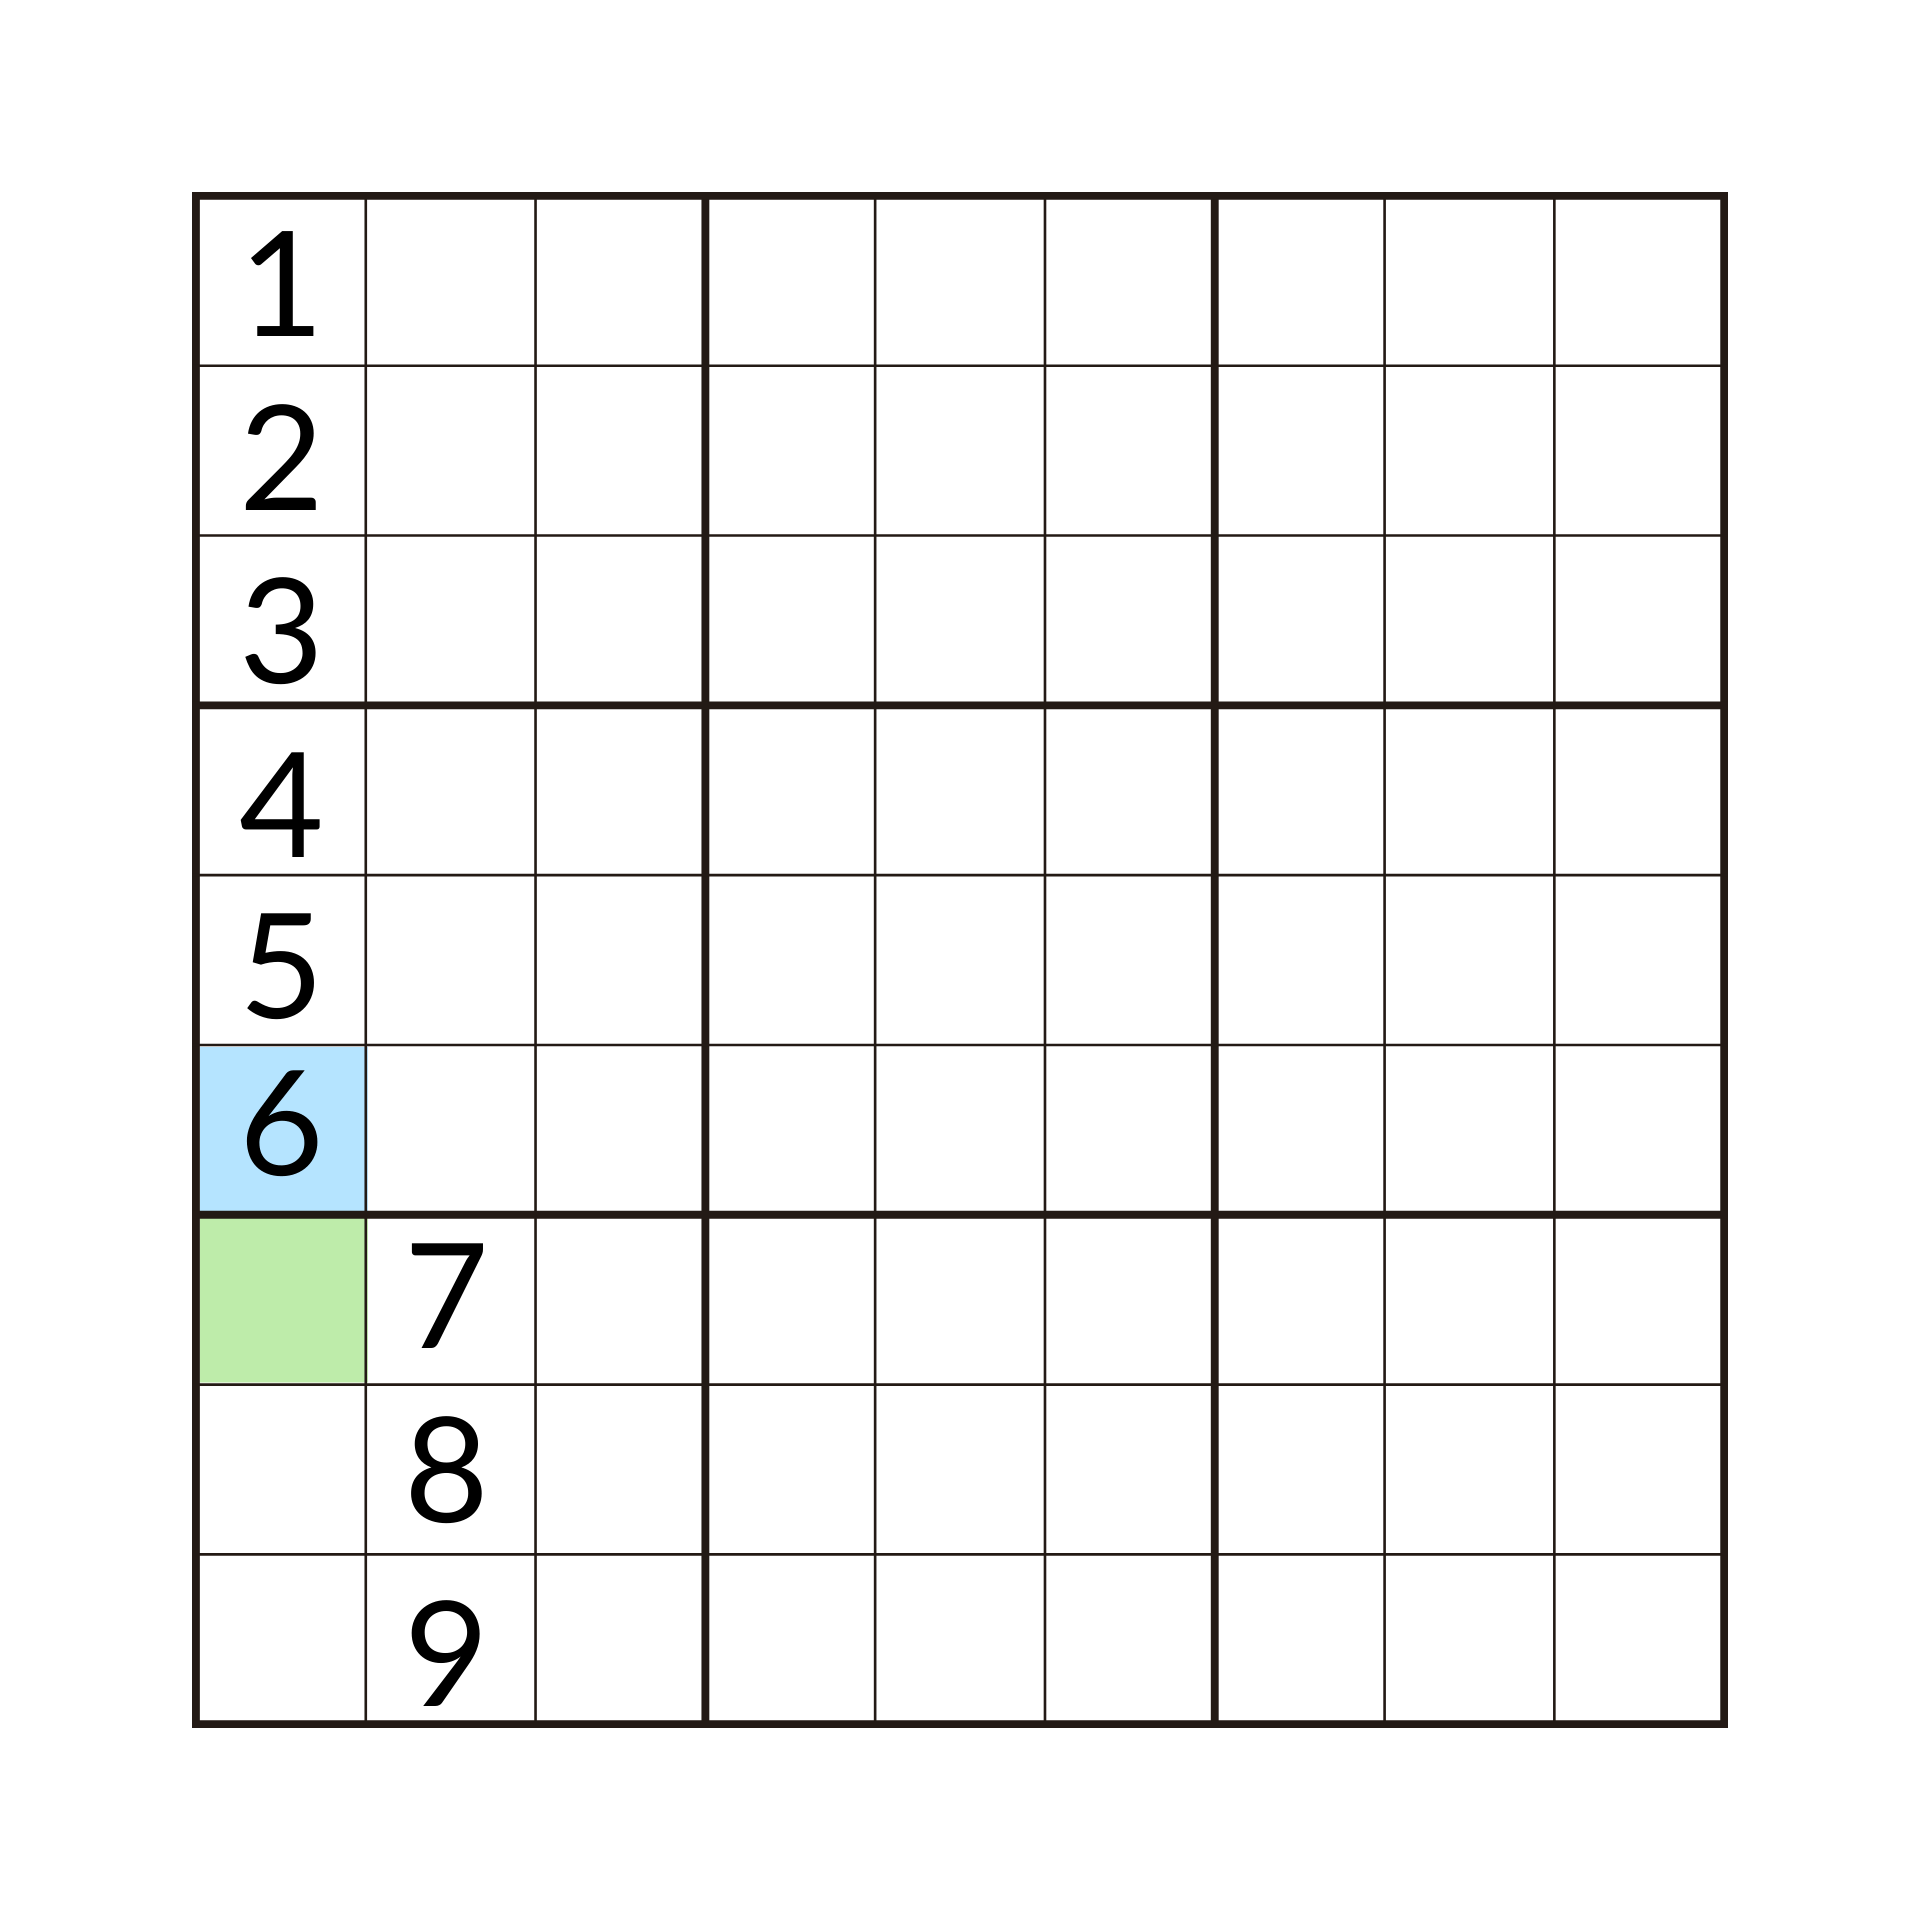
Take the below image (Thanks to my buddy Nathan for providing me an excellent board state for this example):

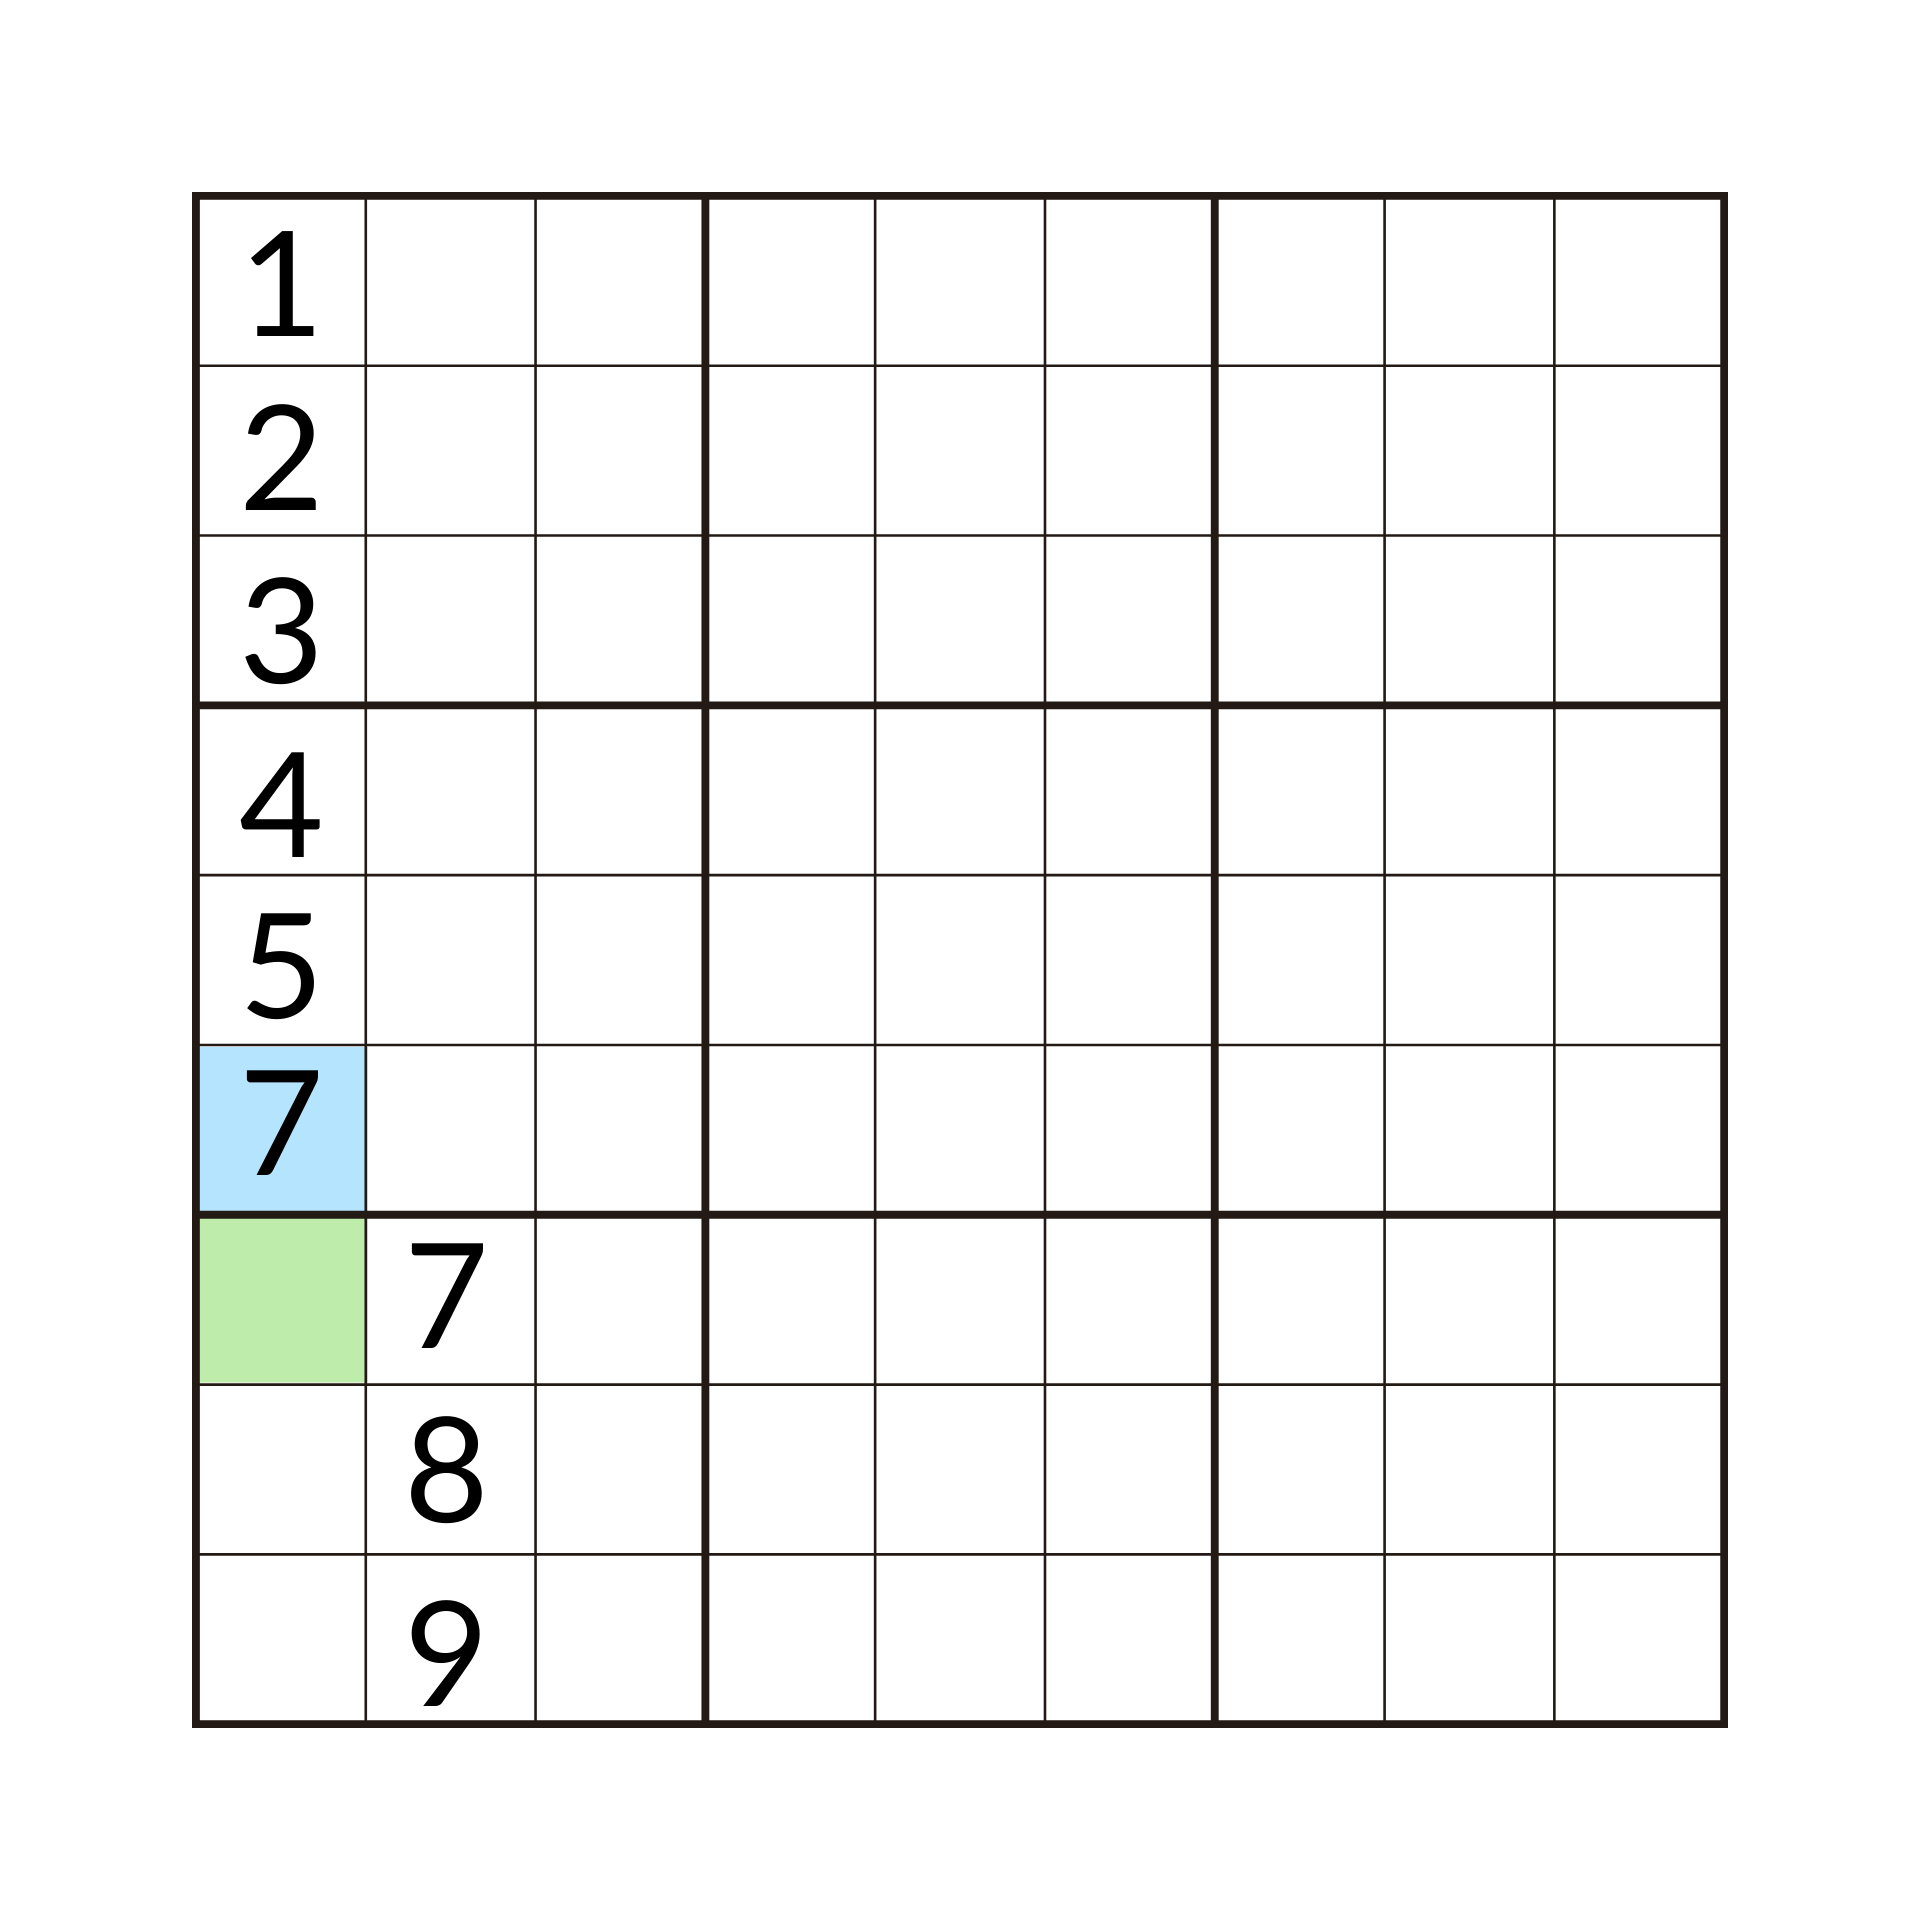
In this example, the blue square represents the last number that the algorithm was successfully able to place. The green square represents the space where the algorithm is currently trying to place a number. Now, based on how the algorithm currently works, we know that it will try (and fail) to place all the numbers from 1 – 6 in the green square as they are all already present in the column. Then the algorithm will try to place an 7 which will obviously fail, as will its attempts to place an 8 and 9. “Oh no!” you cry, “The algorithm has exhausted all of it’s options! We’re doomed!!”. Woah, hold on there. All is not lost, there is still hope yet! A hero is here to save the day!

You’d better approve of my clearly excellent graphic design skills for our hero, Backtrack Man.
I’m not proud of the amount of time I spent to get that result. Anyways, moving on!
As we established, our algorithm must now backtrack to be able to solve the puzzle. So the algorithm will return to the blue square and try to place the next value. It will successfully place a 7 and try to move to the green square and find a value for it. This method of returning to the blue square and adjusting its value is backtracking. In this example, the algorithm would have to backtrack a lot to be able to finish this column, but we don’t need to explore the whole process it would go through here. We just need to understand the concept of backtracking.

Now armed with the awesome knowledge of backtracking, I implemented two functions; Solve and isValid.
Step 3.1 Implementing the isValid() function
For my solving algorithm to be functional, it would need to be able to adhear to the rules of sudoku, so I created a function to ensure that it would. This function takes in four parameters: It takes in a 2D array which represents the current state of the puzzle, it takes in an x coordinate and a y coordinate, and the value that it is trying to place at those coordinates.
This function will then check the cells in the same row, column, and 3×3 grid to determine if placing our value there is a valid move.
Step 3.2 Implementing the solve() function
The moment we’ve all been waiting for! This is the function that does all the heavy lifting.
This function takes in a board (2D array) which it will attempt to solve. It works by traversing down each column then across. When it finds a cell that has no value in it, it will iterate over all possible values and uses the isValid() function to determine if the current value can be placed in that cell. If it cant, it will move to the next value and try that one. If it can place the value in the current cell, it does! It then recursively calls itself with the new board. If this recursive call eventually returns with a -1 value, it will reset the current cell to 0, then move on to try the next value. However, it if this recursive call eventually returns a completed board, then we’ve done it! It will just keep returning this completed board until we’ve broken out of this recursive call stack.
And we’re done!
Everything else after this stage was to do with manipulating the UI elements. I simply created a JS that contained a bundle of functions to help me manipulate the UI during the user’s interactions with the app. If you wish to take a look at the rest of the files I used, feel free to check out my GitHub repository. Addimtedly, its not a very impressive repository because I created the whole app without GitHub, then uploaded it afterwards. I promise I since learned to use it!


